Customer demands for unique parts and products, as well as requests for greater customization, are driving industry toward more high-mix, low-volume (HMLV) manufacturing operations. Though much of the design and configuration of HMLV operations can be managed with operations software, there are significant hardware requirements associated with HMLV manufacturing as well.
One area in which this is particularly true is in metal manufacturing, where adoption of first-time right (FTR) production methods are key to making HMLV manufacturing viable. Gisbert Ledvon, director of machine tool business development at Heidenhain Corp. (a supplier of encoders, machine controls, and metrology equipment), says, “The change to FTR parts production is a current trend because the market is changing frequently and, in many cases, parts are needed quickly and those ordered from overseas won’t make it in time due to shipping delays. So, the supply chain must act quickly in order to serve internal or external customers providing small volume and high mix.”
According to Ledvon, those five steps are:
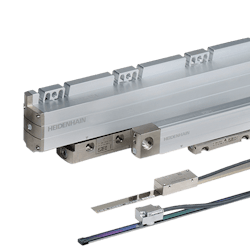
1. Select or upgrade to a 5-axis machine tool with a modern motion control system which not only moves the axis faster but is also able to guarantee reliable position accuracy even if some of the machine components like the axis ball screws warm up and expand during the machining process. “To overcome thermal expansion, a closed loop system using linear encoders is much more advisable than a rotary encoder connected to the ball screw that relies on the accuracy of a ball screw and some software compensation within the CNC,” Ledvon says. “It is always better to measure the actual position of the table or the column of the machine. This way, you can machine your first part right no matter at what time of the day or on what position within the machine travel envelope.”n>
3. If you have large temperature swings in and around a 5-axis machining center, Ledvon says a flexible machine kinematic calibration or verification is critical. “Using the workpiece touch probe and a reference ball mounted to the rotating/tilting machine table allows you to use a CNC calibration cycle and implement the re-calibration of the kinematics on the fly, assuring perfect positioning accuracy between all five moving axes,” he says.
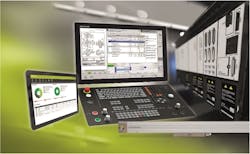
4. The CNC control system on your machine should be easily connectable to your network so that you can send or retrieve information such as machine programs, and set up sheets, part drawings, and DXF or IGES files in case you have to program on the machine, advises Ledvon. “It is also helpful to include a dynamic collision monitoring system to provide the operator a tool to confidently machine complex parts without damaging the machine or part,” he says. “The CNC should also offer a large tool library so you can keep track of tool life and availability. This will assist in machining the first part to size because you will know how long the tool will last and be able to finish the part with confidence.”
5. Incorporate in-process inspection of your part and the cutting tool, Ledvon says. “Most of us know that it is not advisable to inspect a part on the same machine it was made on, but I argue that if you have invested in a very accurate machine tool at the start, you can do an inspection of the part there to at least see if you are within the tolerance band that the print calls for,” he says. “If not, you can still make a quick change to your tool offset or program and re-machine the part while it is still in setup in the machine. This can save you lost time later in your metrology inspection because you machined the first part right to size.”


